Business Unit Category
Add an email signature
Coding Restrictions
Create new Business Unit
Custom Fields on Line Items
Customised labels
Date formating
Default delivery address
Division Management
Editing Email Templates
How to hide cost codes
Invoice email forwarding – Microsoft 365
Pros and Cons of Using Zahara’s Inbuilt Email Service vs. Your Own SMTP
SMTP & Email Sending
T&C on your PO Template
Invoice Processing Help Category
Auto reject supplier invoices
Auto rejecting of invoices issue
Finding an order or invoice
How to create a credit note
Invoice email forwarding – Microsoft 365
Invoice export colours
Invoice Inbox
Invoice List View
Invoice matching
Invoice Processing Explained
Month end cut offs
Negative Order Balance
Setting up Autopilot
Supplier Matching
Waiting for a GRN
Purchase Orders Category
Adding a product to an order
Adding documents to an order
Bulk importing orders
Close Orders Automatically
Closing an order
Copy PO to Buyer
Creating a Purchase Order
Deleting a PO
Duplicate Order Prevention
Editing an order
Finding an order or invoice
GRN an Order – Learn with this Guide
Grouped Purchase Orders
Import Line Items
Negative Order Balance
PO Template Editing
Product Centric Buying
Purchase Order Numbering
Purchase Order PDF
Purchase Order Prefix
Purchase Requisition Number
Quick Create a Purchase Order
Send PO to Supplier
Supplier order acceptance
What is a Purchase Order?
We have two ways for a supplier to accept an order. The first is more sophisticated. It requires the supplier to digitally sign your terms and conditions before receiving the order.
The second is very easy, you can add Accept/Reject buttons to the supplier email template and see the status in your Purchases list view.
There may be times where it isn’t good enough to just email the supplier a purchase order. You might want them to acknowledge receipt of this order together with your schedule of works or terms and conditions. We have created a routine that allows a vendor to review and accept documents, and for them to digitally sign to accept it. It works like this:
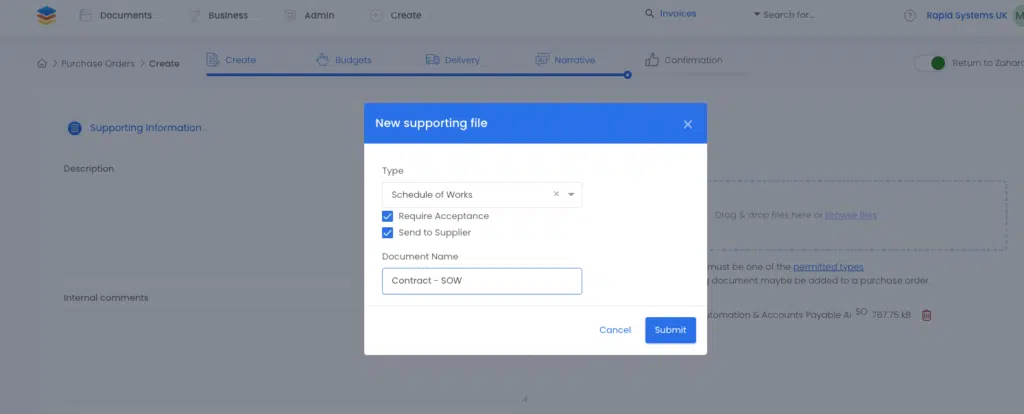
Create your order in the usual way. On the page that offers you the ability to add documents, click the icon and choose “Schedule of Works” from the type. Then tick “Requires Acceptance” as shown below.

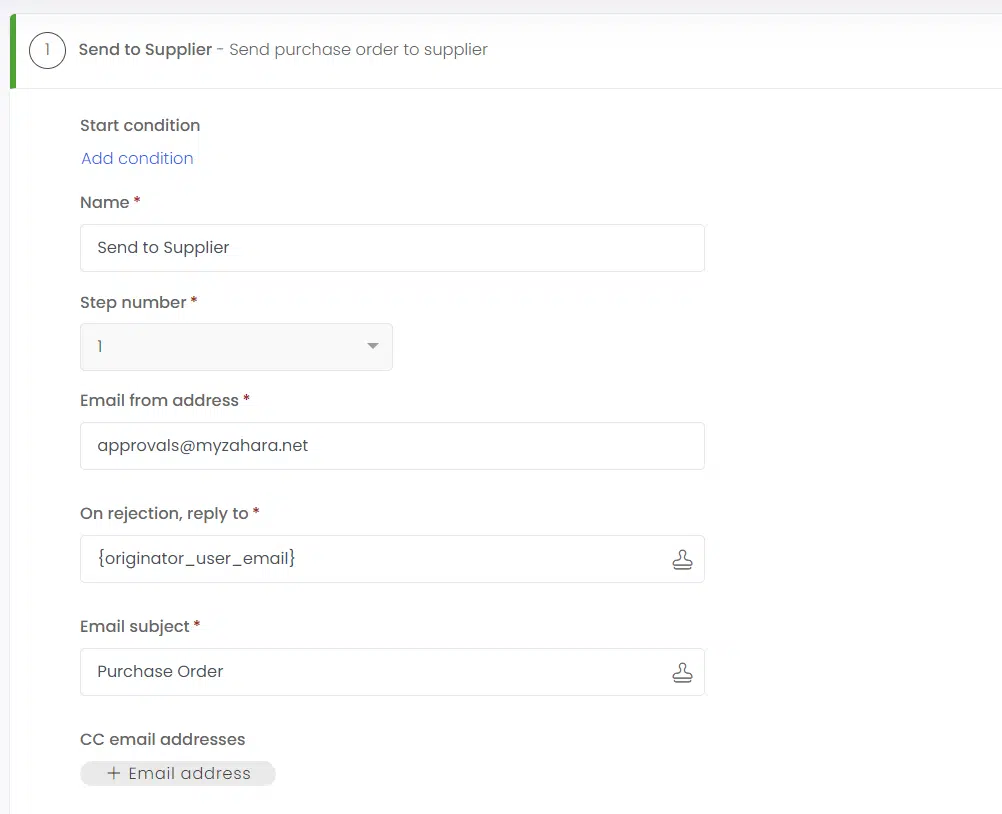
Complete your order and make sure it goes into a workflow that at least has a step of “Send to Supplier”.

Once approved and the Send to Supplier step is engaged, the vendor will receive an email from Zahara asking them to take action. The wording of this email is editable in Business Settings > HTML Templates tab as shown below:
The supplier will now receive an email as shown below:
Once the “Review link” is clicked, they will be taken to this screen:
Here they will see a screen with your “Schedule of Works” document and the line items of your order that accompanies it. (you can attach whatever PDF document you like – terms and conditions/terms of business, but for the purposes of this procedure we call it a “schedule of works”)
The status of the order will show as below until the vendor takes action:
A more simplistic approach to having your suppliers accept the purchase order is to add supplier acceptance buttons to the Supplier Purchase Order template. The place holder is shown below – {vendor_acceptance}
When the supplier receives their email, it will show as this:
The status of the acceptance can be shown in the Purchases list view when the field is added using the table icon and editing the choices: