Business Unit Category
Add an email signature
Coding Restrictions
Create new Business Unit
Custom Fields on Line Items
Customised labels
Date formating
Default delivery address
Division Management
Editing Email Templates
How to hide cost codes
Invoice email forwarding – Microsoft 365
Pros and Cons of Using Zahara’s Inbuilt Email Service vs. Your Own SMTP
SMTP & Email Sending
T&C on your PO Template
Invoice Processing Help Category
Auto reject supplier invoices
Auto rejecting of invoices issue
Finding an order or invoice
How to create a credit note
Invoice email forwarding – Microsoft 365
Invoice export colours
Invoice Inbox
Invoice List View
Invoice matching
Invoice Processing Explained
Month end cut offs
Negative Order Balance
Setting up Autopilot
Supplier Matching
Waiting for a GRN
Purchase Orders Category
Adding a product to an order
Adding documents to an order
Bulk importing orders
Close Orders Automatically
Closing an order
Copy PO to Buyer
Creating a Purchase Order
Deleting a PO
Duplicate Order Prevention
Editing an order
Finding an order or invoice
GRN an Order – Learn with this Guide
Grouped Purchase Orders
Import Line Items
Negative Order Balance
PO Template Editing
Product Centric Buying
Purchase Order Numbering
Purchase Order PDF
Purchase Order Prefix
Purchase Requisition Number
Quick Create a Purchase Order
Send PO to Supplier
Supplier order acceptance
What is a Purchase Order?
Our integration with QuickBooks Online syncs Vendors, GL Codes, Tax Rates and Classes. In addition, invoices (Bills/expenses) created in Zahara can be exported into QuickBooks.
To connect to QuickBooks Online, within Zahara, click into Business Settings. Use the Business menu from the main menu and then Settings. Once in Business Settings, you will be able to access the QuickBooks Online settings by clicking the Integrations tab on the left-hand side towards the bottom.
Before you go any further, please note – Zahara relies on your Account Codes – what some people call General Ledger codes or Nominal codes. To enable the posting of invoices in QuickBooks Online, you will need to make sure your codes are enabled and populated if they aren’t already.
This is a setting in QuickBooks Online. To do this log in to QuickBooks Online and click the settings icon in the top right corner. Then click accounts & settings and finally advanced.
Now find “Enable Account Numbers” as above, and switch it to on and set them to show.
You may now need to edit all of the ones you wish to use in Zahara and add numbers. Then when you sync with Zahara the chart of accounts will come over to Zahara, enabling invoices to post back.
From the Integration tab of Business Settings, as shown below, click QuickBooks Online:
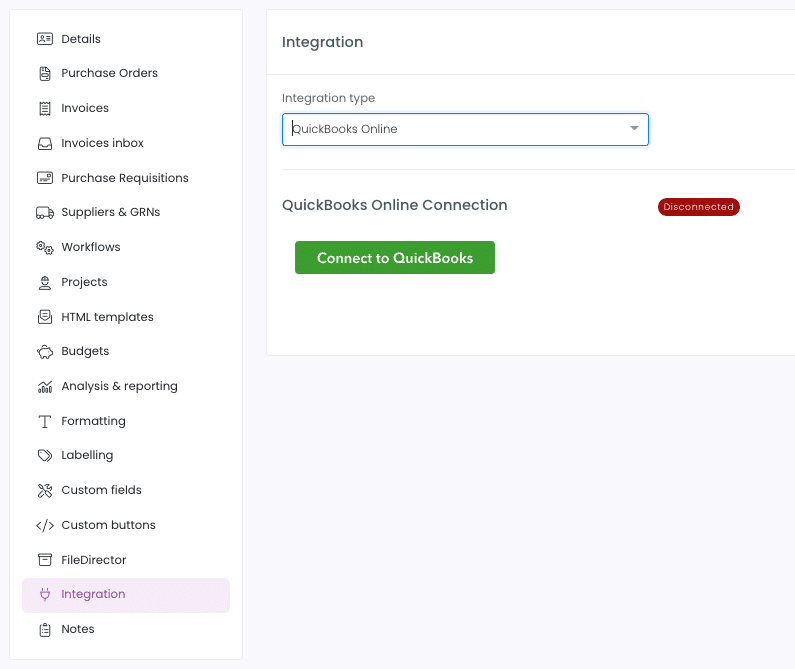
Next, click the Green button “Connect to QuickBooks”
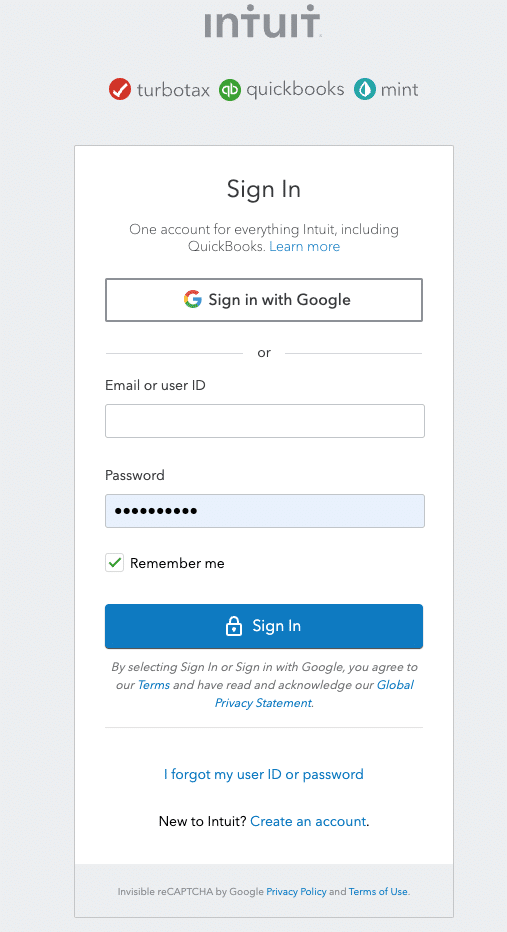
You should see the familiar screen above that allows you to put in your dedicated QuickBooks-Zahara username and password to authenticate with QuickBooks. Once authenticated, you will be taken back to Zahara and you will need to click into the Integration tab again.
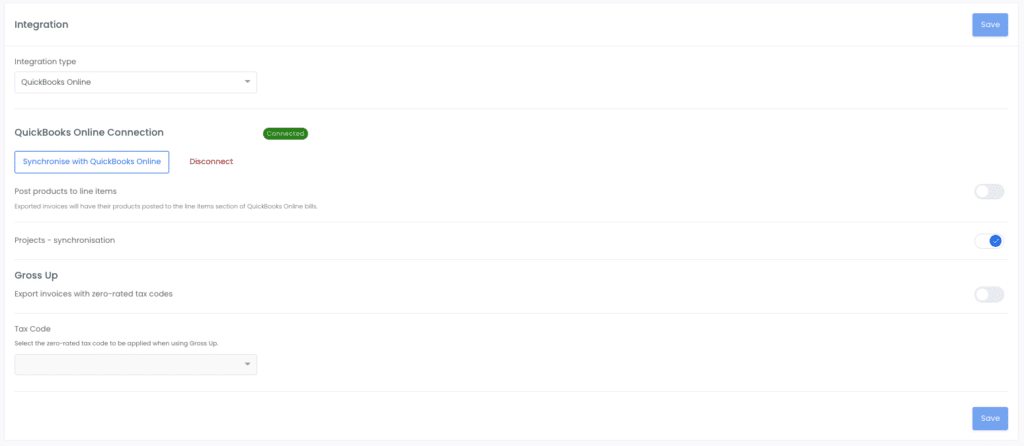
Now you will be ready to Sync with Zahara.
Now click the “Synchronise with QuickBooks Online” button. Zahara will schedule a full sync. You should see a screen like this:
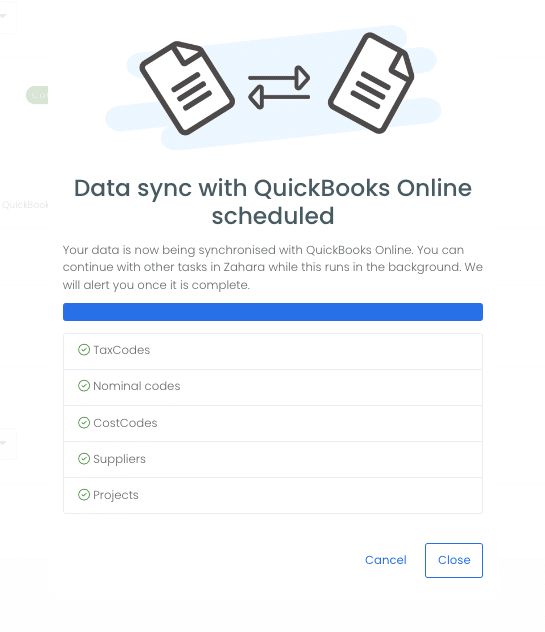
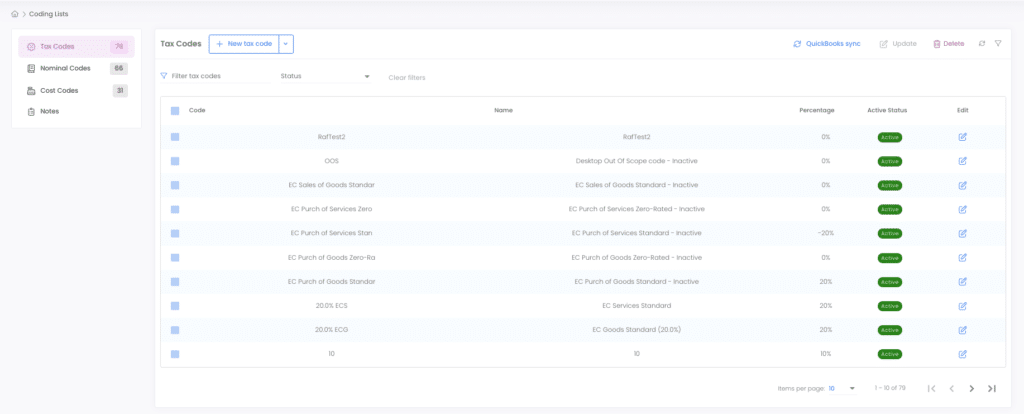
This is a background-process so you can carry on. If you click into suppliers or Coding lists, like below, you will notice individual sync icons. This allows you to sync individual data sets as well.
“Post Products to Line Items” option.
You have an option of switching this on. By default, all invoices in Zahara are posted to QuickBooks Online as expenses. If you enable this setting, any invoice lines with product codes will be posted as items. If you have corresponding product codes in both Zahara and QuickBooks, and you have stock control enabled in QuickBooks, quantities will be updated from the posted invoices.
If this setting is enabled, projects in Zahara will sync with projects in QuickBooks Online
Classes in QuickBooks Online will sync with Cost Codes in Zahara. You can rename the Cost Codes label in Business Settings under labelling.
Gross up is a feature across all of our integrations where we can convert standard invoices with Tax to a Gross figure with no tax. This is designed for businesses that do not reclaim tax (VAT / GST)
The final usage for an integration with QuickBooks Online is to export your invoices in Zahara into QuickBooks. You can do this in two ways. The first way is a manual export of the invoices. The second way is to have a workflow step of “Export Invoice” and ensure your invoices use this workflow.
Manual export
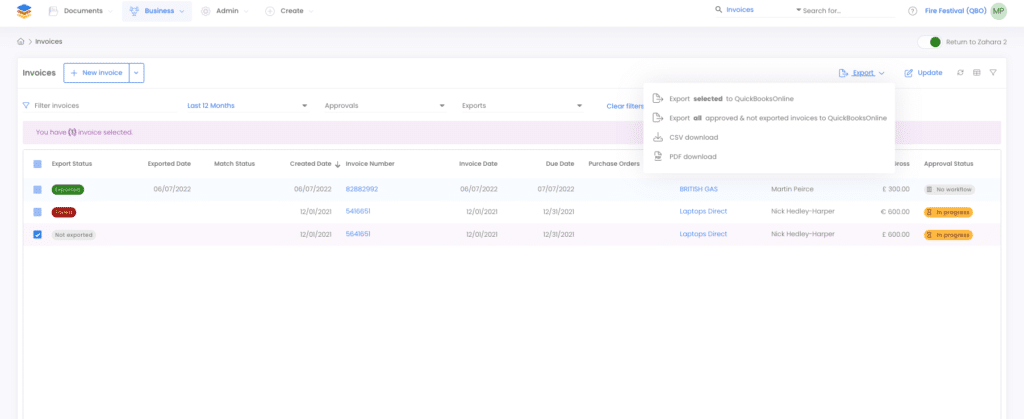
In the screen shot above, the invoice is selected with a tick. Then export menu is clicked and the first option is “Export selected to QuickBooks”. If you click this, the invoice will be exported to QuickBooks together with the PDF of the invoice.
You may see errors in the export from time to time. A successful export will display a Green icon with the word ‘Exported’. A failed export will show – as above – red, and Failed. To find out why the invoice failed to export, click into the invoice, by clicking the Invoice number.
As you will see below, the Document History shows the reason why it failed:
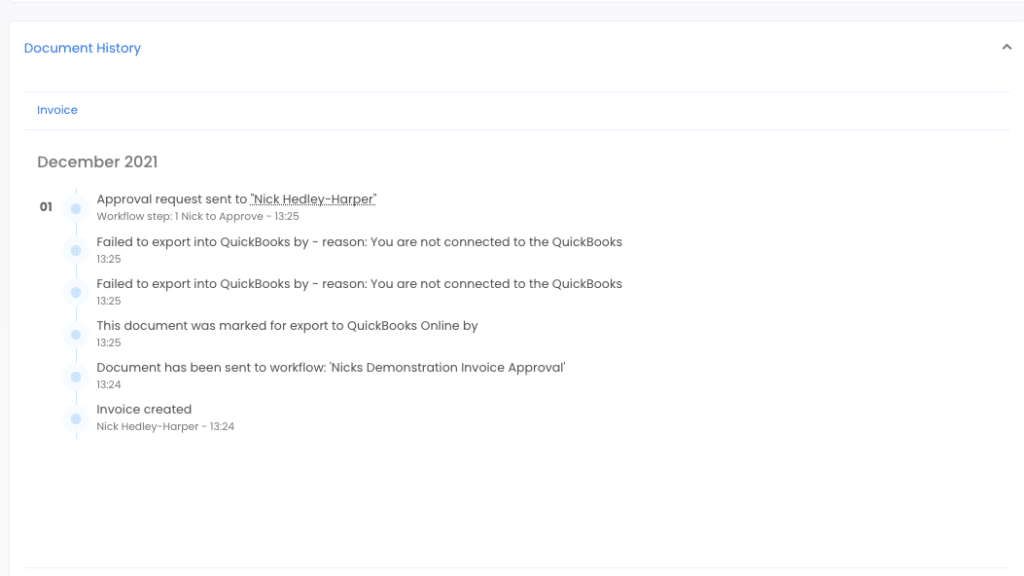
In this case, the Business Unit in Zahara had become disconnected from QuickBooks. Other reasons might be invalid coding combinations. The document history is the starting point to find out why you have an issue. You can make the correction and then re-export.
We recommend you work on the principle that all approved invoices are exported straight away into QuickBooks. At month-end or at any time you wish to make accruals, the invoices awaiting approval or on-dispute are in Zahara and can be accounted for using Zahara’s reporting. Anything in QuickBooks can be paid. Anything in Zahara and not in QuickBooks can be accrued for.