Business Unit Category
Add an email signature
Coding Restrictions
Create new Business Unit
Custom Fields on Line Items
Customised labels
Date formating
Default delivery address
Division Management
Editing Email Templates
How to hide cost codes
Invoice email forwarding – Microsoft 365
Pros and Cons of Using Zahara’s Inbuilt Email Service vs. Your Own SMTP
SMTP & Email Sending
T&C on your PO Template
Invoice Processing Help Category
Auto reject supplier invoices
Auto rejecting of invoices issue
Finding an order or invoice
How to create a credit note
Invoice email forwarding – Microsoft 365
Invoice export colours
Invoice Inbox
Invoice List View
Invoice matching
Invoice Processing Explained
Month end cut offs
Negative Order Balance
Setting up Autopilot
Supplier Matching
Waiting for a GRN
Purchase Orders Category
Adding a product to an order
Adding documents to an order
Bulk importing orders
Close Orders Automatically
Closing an order
Copy PO to Buyer
Creating a Purchase Order
Deleting a PO
Duplicate Order Prevention
Editing an order
Finding an order or invoice
GRN an Order – Learn with this Guide
Grouped Purchase Orders
Import Line Items
Negative Order Balance
PO Template Editing
Product Centric Buying
Purchase Order Numbering
Purchase Order PDF
Purchase Order Prefix
Purchase Requisition Number
Quick Create a Purchase Order
Send PO to Supplier
Supplier order acceptance
What is a Purchase Order?
Approval workflows are administered from the Divisions. Divisions are found under the Business menu. Workflows can be created for both Purchase Orders and Invoices. There are a number of steps that you can add to a workflow, and each step can have a condition to decide whether the step should be undertaken or skipped.
The key learning points from Zahara’s approvals are these:
Zahara’s invoice approvals can route an invoice to one or more people inside the organisation for their approval. The outcome of an invoice approval will not only be to show that the invoice is approved – clearly visible in the invoice list view, but you may also want to export the invoice into the finance system. All of these things can be achieved. There are multiple invoice conditions you can use to decide whether a step is to be used, including:
Creating an Invoice approval.
Before you start creating your invoice Workflow, ensure you have added the users into your Division so that your approvers are already in your team. Once this is done, click on New Workflow
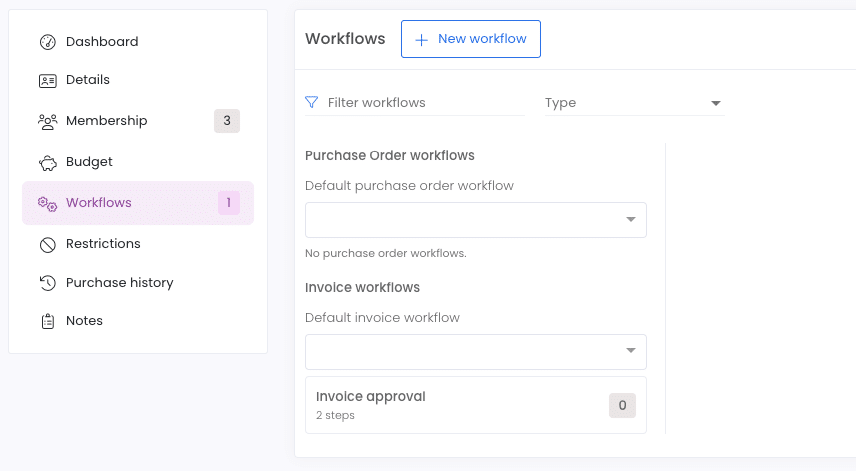
Now follow the Wizard. Watch the video below to see how to add the workflow steps, use conditions and set the default workflow.
Purchase Order workflows are more like purchase requisition approvals. We are taking the request to buy something and routing it for approval, with the outcome being to update the buyer or send the purchase order to the supplier. The workflow steps available to you are:
Watch the video below to see how we create a muti-step approval request and then send a Purchase Order to the supplier
One of Zahara’s strengths is the ability to create sophisticated workflow steps that only trigger under certain circumstances. For example, with an invoice approval, we can use the conditions to only trigger in quite specific circumstances such as
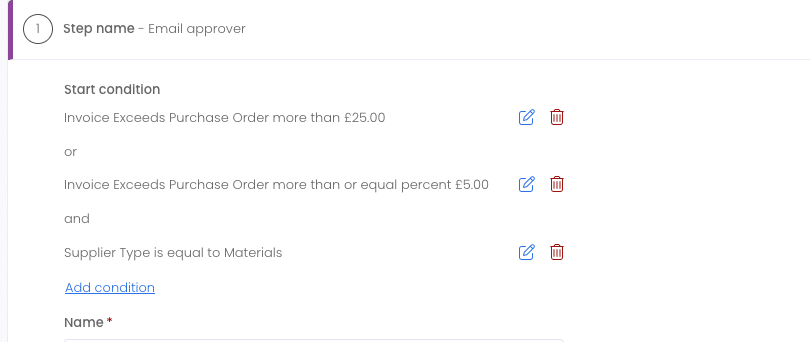
In this example, the invoice step will only trigger (be used) if an order exists and the Order exceeds the invoice by £25 or 5% AND the supplier type field = ‘Materials’.
This step condition is Binary – it resolves to True or False. If True, we will ask the approver to approve. If false, we will skip this and go on to the next step. And this is the essence of Zahara’s approval workflow steps.
For users to choose a workflow when raising an order or an invoice, they need the Admin role. This is now easy to set and change in the Division. Move into the Membership tab and adjust to suit.
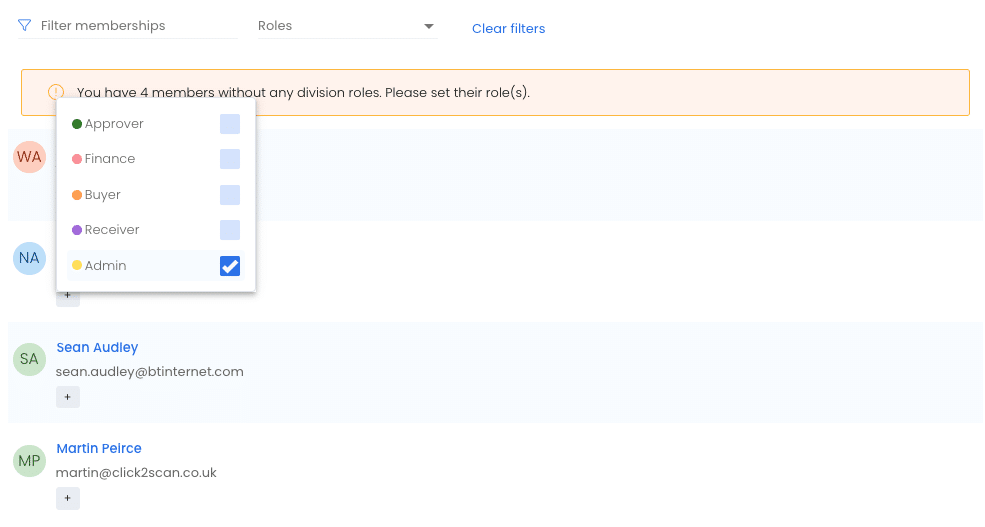
If a user has this permission, they can choose a workflow. The user can only raise a document without the admin role with the default workflow. Watch the video below to see the difference.
Both the Purchase Order List view and the Invoice List view have the approval status field that can be shown in the list. Clicking this will reveal the Approval Status and show you which step the workflow has gone to:
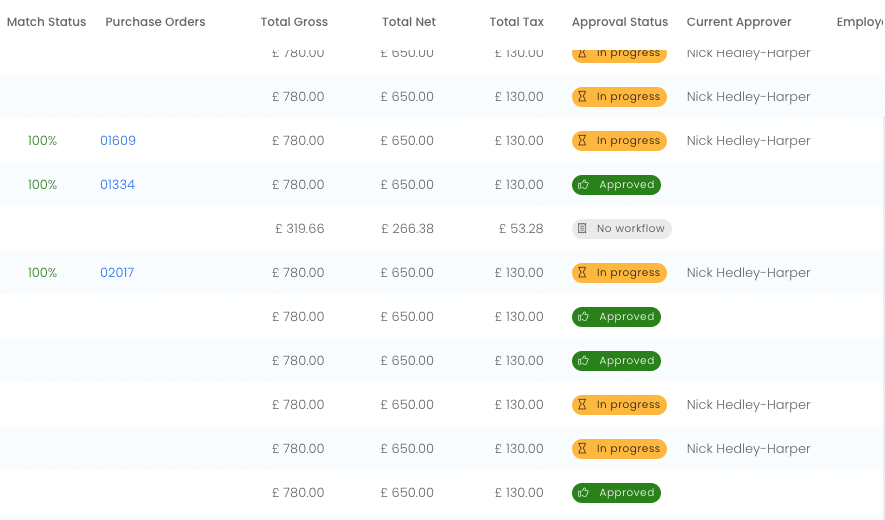
Then click the approval status to reveal the workflow and its progress:
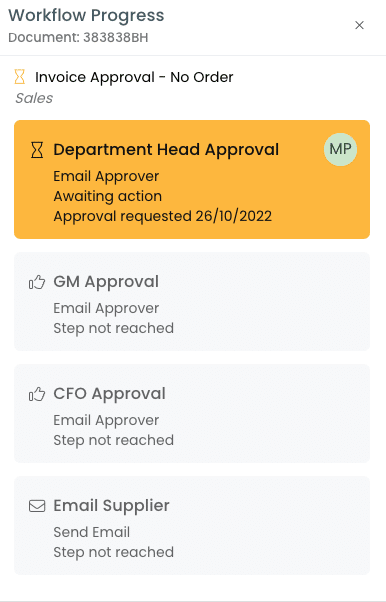
A grey colour above will show either that the step hasn’t been processed yet or that it’s been skipped. Once the workflow has completed all the steps that are supposed to have been completed, the workflow status will be approved and shown green in the list view.
The mobile app provides the best experience for approving. Once you have set up Zahara, we recommend you enable your approvers to use the Mobile app. They will receive push notifications for each approval and will have everything they need in one place.
The Approval step can be undertaken in several ways:
The user has multiple ways of engaging with the approval request. Zahara receives thousands of approval requests per hour, resulting in occasional speed bumps with the approval email taking a few minutes to arrive. Usually, the approval email is sent within 60 seconds. The user can approve directly from the email or can click the “Review with Details” link in the email to see a more advanced view. There is a setting in Business Settings > Workflows that forces the user to log in. There is also a setting to force the user to choose from the preset list of Reject reasons.
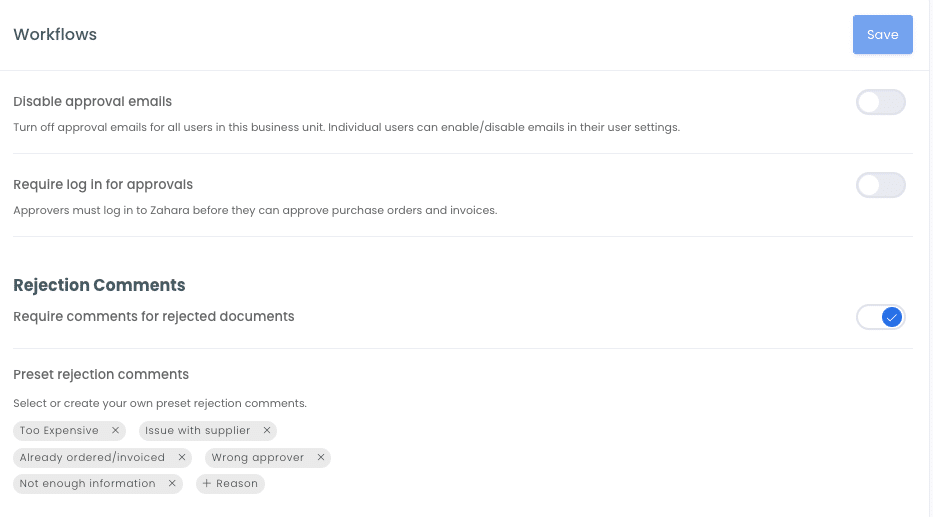
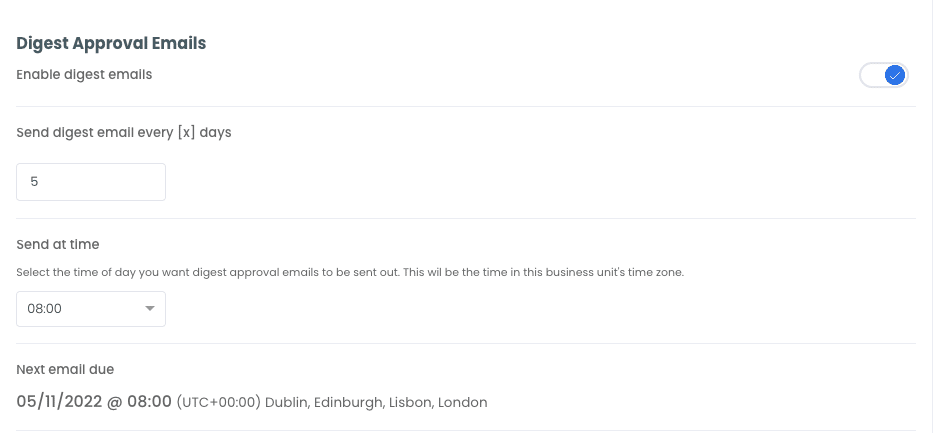
Getting approvers to take action is your goal. With purchase requests, speed can be essential, particularly if you need a next-day delivery. It’s important for you to set the rules for your team. However, Zahara does offer a reminder email that can be sent. This is set in Business Settings > Workflows:
Group approvals allow an approval step to target several people – a Group. Adding the step into the workflow gives you a choice of
Broadcast
This is the simplest option. All the users you choose in the next section will receive the approval request. The first one to approve will complete the step.
Dynamic
We have an algorithm to decide who out of the users we will send this to. This is made up of availability and existing workload.
Round Robin
This is in order, so Bob>Sue>Mike>Bob>Sue>Mike etc. – So the users you choose will be looped.