Business Unit Category
Add an email signature
Coding Restrictions
Create new Business Unit
Custom Fields on Line Items
Customised labels
Date formating
Default delivery address
Division Management
Editing Email Templates
How to hide cost codes
Invoice email forwarding – Microsoft 365
Pros and Cons of Using Zahara’s Inbuilt Email Service vs. Your Own SMTP
SMTP & Email Sending
T&C on your PO Template
Invoice Processing Help Category
Auto reject supplier invoices
Auto rejecting of invoices issue
Finding an order or invoice
How to create a credit note
Invoice email forwarding – Microsoft 365
Invoice export colours
Invoice Inbox
Invoice List View
Invoice matching
Invoice Processing Explained
Month end cut offs
Negative Order Balance
Setting up Autopilot
Supplier Matching
Waiting for a GRN
Purchase Orders Category
Adding a product to an order
Adding documents to an order
Bulk importing orders
Close Orders Automatically
Closing an order
Copy PO to Buyer
Creating a Purchase Order
Deleting a PO
Duplicate Order Prevention
Editing an order
Finding an order or invoice
GRN an Order – Learn with this Guide
Grouped Purchase Orders
Import Line Items
Negative Order Balance
PO Template Editing
Product Centric Buying
Purchase Order Numbering
Purchase Order PDF
Purchase Order Prefix
Purchase Requisition Number
Quick Create a Purchase Order
Send PO to Supplier
Supplier order acceptance
What is a Purchase Order?
This help article will help you set up the Invoice Inbox and start getting your invoices read, for fast and easy processing. So let’s get you started.
To have access to the Invoice Inbox, you need to have full permissions for invoices – create, edit, delete and view. You must also have the “Finance” or “Admin” role in every division of one or more Business Units or have “Tenancy Admin” status in order to be able to access the inbox. If you are on a Trial, you will have full access from the start.
For other users, If they have “Finance” or “Admin” roles for every division of multiple Business Units, you can process invoices for multiple companies. You will only be able to see invoices for the Business Units that you are assigned to. If you are unsure what this means, read the article on user management.
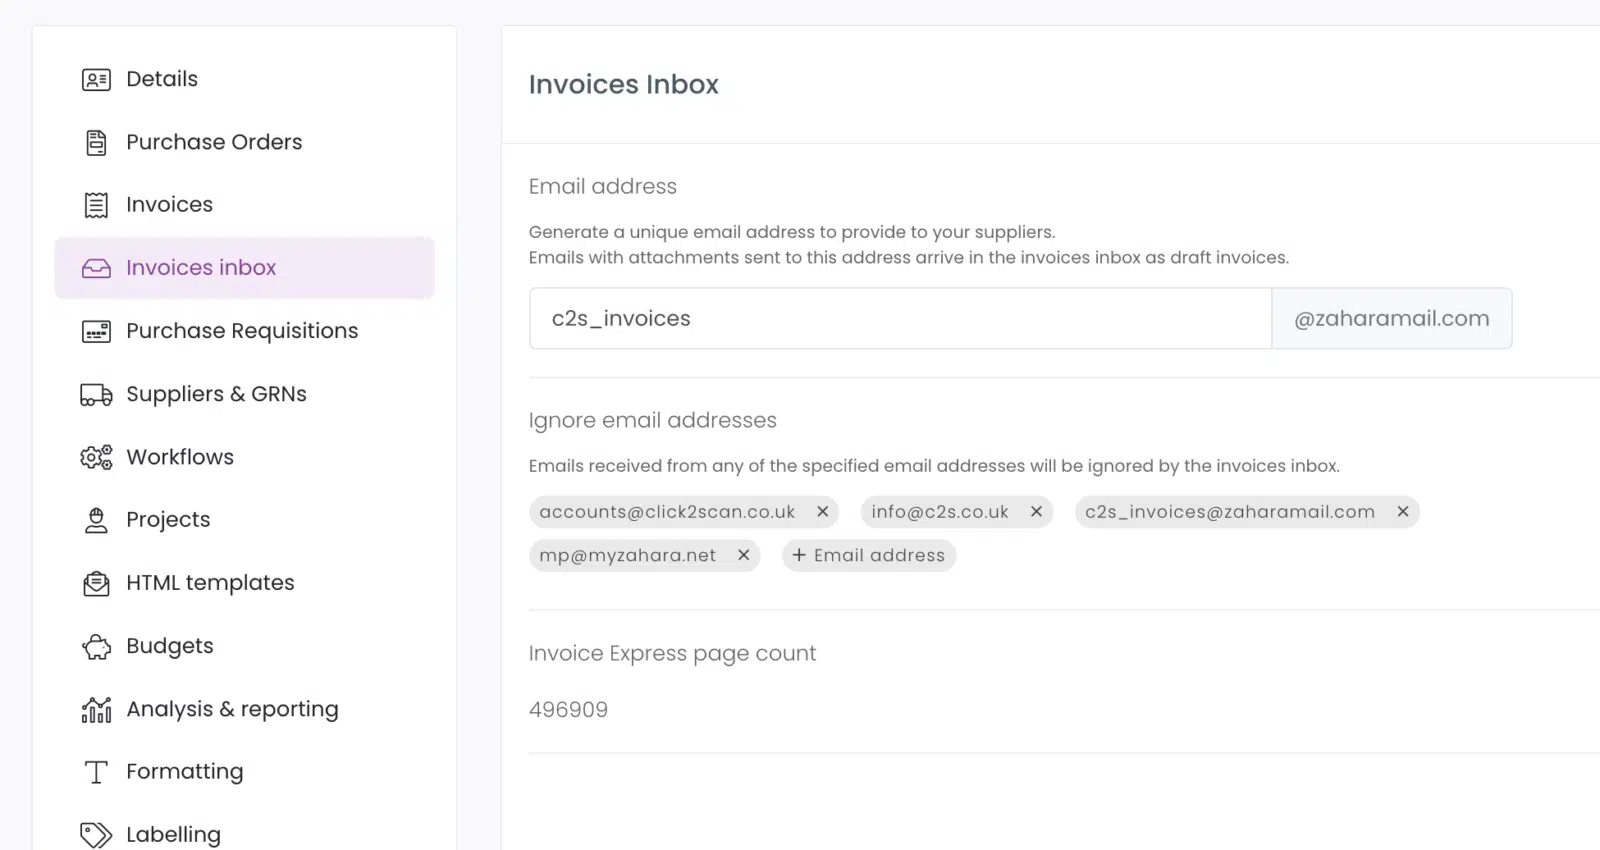
You can generate your own @zaharamail.com email address for your suppliers to send their invoices. Zahara will then extract any attachments contained within the email and present them within the Invoices Inbox. Once an invoice arrives in the inbox, provided you have invoice OCR count left, the invoices will be automatically read for you. watch the video below for a fast overview
Head to Business Settings > Invoice Inbox and generate an email address for that Business Unit. You can have any unique address. We recommend you use your company name or a variant like zahara_invoices@zaharamail.com
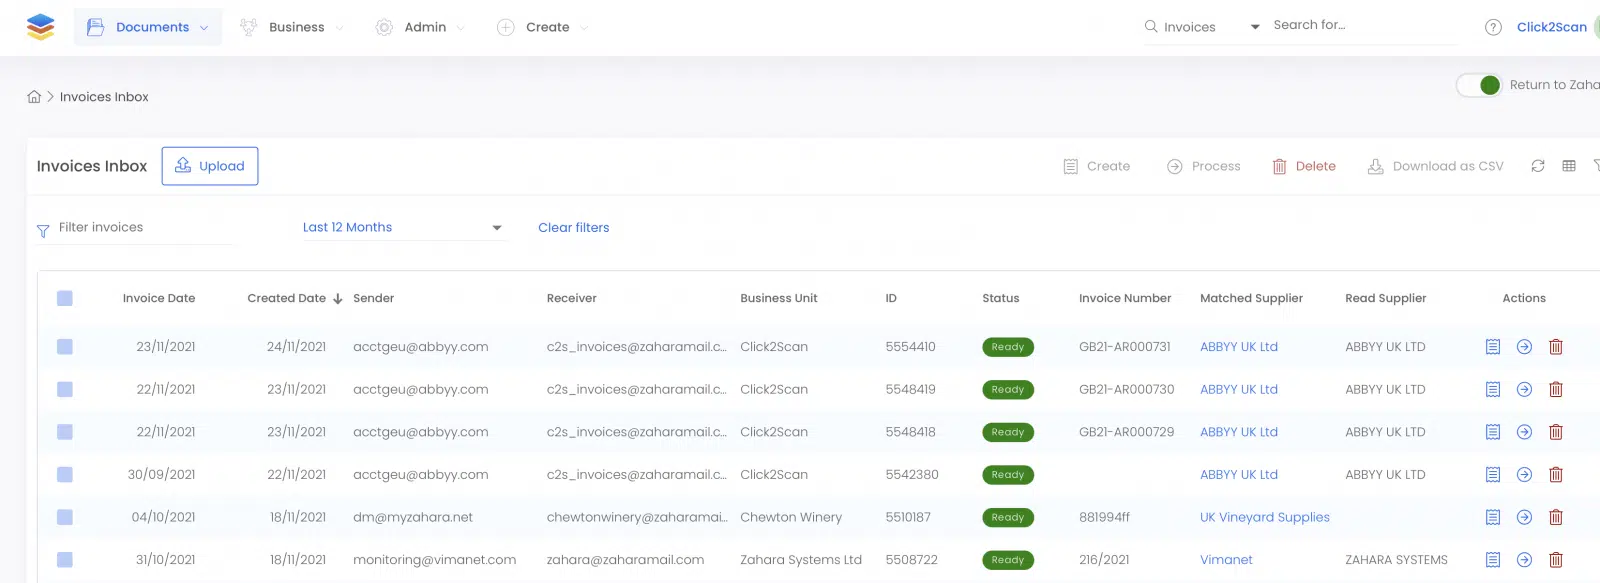
Test it straight away. Email a PDF attachment to this email address. It should then appear in the Invoices Inbox. You access the inbox from the Documents menu. Documents > Invoice Inbox.
There is no other way to see these emails but anything emailed with attachments to that address should appear in the Inbox. If you are all set here, jump straight down the page to the section “Setting Up Your Business Unit Email”
Only emails with attachments will be processed. No other emails should be sent to this address – they will be ignored and lost.
Zahara supports you forwarding invoices from your own email account so in the Email field in the screenshot below, put all of the emails that may forward emails. We will only use the domain part of the email so just one domain email should be sufficient. What happens here is that for a forwarded email, we will check to see if the sender’s email domain is in this record. If it is we will skip and start reading the body of the email until we find an email address that matches a suppliers email address.

A key thing for accurate supplier matching is to have relevant supplier email addresses recorded against each supplier. It could be that you send purchase orders to one address but get invoices from another. Make sure you record the invoice email addresses in the supplier record. When Zahara receives an email into the inbox it attempts to match the supplier and it will do this on the email address. You can populate the supplier email addresses as you go as well. You will notice the option of saving the email address against the supplier record.
If no email address matches we will look at the OCR results (assuming you have invoice count and the invoice has been read). We will fuzzy match the results with the supplier records we hold for this business unit. If there is a successful match then the supplier record will be populated. This accommodates a multi-page invoice PDF being emailed into Zahara as well. Invoices will be separated and suppliers matched. Some invoices don’t have a supplier name clearly displayed – they may use a logo – so if we cannot find a match, the supplier record will be set to the very first supplier in your list, or left blank. It’s very important when processing invoices that users do cross-check with their eyes this first piece of key information.
If for any reason an invoice is processed against the wrong supplier, you can edit it and change it later on. Just make sure it hasn’t been exported already before you do this.
Invoices will start to appear in your Inbox and the first thing Zahara does is try to match the Business Unit based on the To address of the email and matching that with the value in your Business Settings. Matching the supplier is relatively easy if you have a valid email address stored in the supplier record. Examples below:

You process the invoice by clicking the icon next to the delete icon – the arrow pointing forward. You can adjust the columns in the usual way by clicking the table icon.
On the next screen, you can either click through and process, or make changes and save them, with the document remaining in the Inbox.
PO Matching
If purchase orders are enabled, and the OCR recognition has identified a valid PO number, it will be displayed in the Purchase Orders box. You can manually select an order here as well.
Editing
All other fields can be edited. Typically though this is a checking screen and you will want to click Continue
You now move into the Invoice create screen. This has different sections. The screen shot below shows the invoice line items. You can switch between the lin item edit mode and table view. Click the table icon on the right to see all of the lines.
From here you can edit line items, header fields or any custom fields. When ready click Continue to move on and add comments, set the workflow or add any additional documents.
Finally click continue, check the summary and then click Create. The switch at the bottom will allow you to go straight back to the Inbox.
You can edit each line item individually by clicking the edit icon. You can also batch change the line items by selecting them and clicking the “Update Line” icon. This will allow you to change coding, and other fields all at once.
If you need to make a minor adjustment to a tax line, you can do this in the line item edit view. Edit the line, and then mouse over to the tax amount as shown below:
Zahara excludes all email signature images and most terms and conditions documents. If you have a supplier that sends a separate T&C PDF and it’s still getting through here, let us know the file name and we will add it to the exclude list. This is why we recommend always referencing a T&C in a PO and Invoice with a hyperlink and not a separate document.