Business Unit Category
Add an email signature
Coding Restrictions
Create new Business Unit
Custom Fields on Line Items
Customised labels
Date formating
Default delivery address
Division Management
Editing Email Templates
How to hide cost codes
Invoice email forwarding – Microsoft 365
Pros and Cons of Using Zahara’s Inbuilt Email Service vs. Your Own SMTP
SMTP & Email Sending
T&C on your PO Template
Invoice Processing Help Category
Auto reject supplier invoices
Auto rejecting of invoices issue
Finding an order or invoice
How to create a credit note
Invoice email forwarding – Microsoft 365
Invoice export colours
Invoice Inbox
Invoice List View
Invoice matching
Invoice Processing Explained
Month end cut offs
Negative Order Balance
Setting up Autopilot
Supplier Matching
Waiting for a GRN
Purchase Orders Category
Adding a product to an order
Adding documents to an order
Bulk importing orders
Close Orders Automatically
Closing an order
Copy PO to Buyer
Creating a Purchase Order
Deleting a PO
Duplicate Order Prevention
Editing an order
Finding an order or invoice
GRN an Order – Learn with this Guide
Grouped Purchase Orders
Import Line Items
Negative Order Balance
PO Template Editing
Product Centric Buying
Purchase Order Numbering
Purchase Order PDF
Purchase Order Prefix
Purchase Requisition Number
Quick Create a Purchase Order
Send PO to Supplier
Supplier order acceptance
What is a Purchase Order?
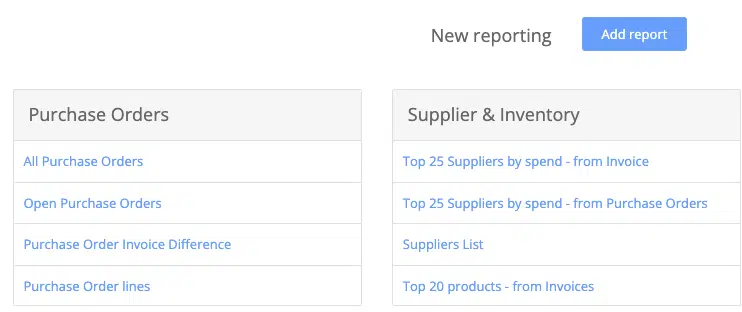
We have a number of reports that are available in the reporting which is found under the Admin menu. The process to run a report is
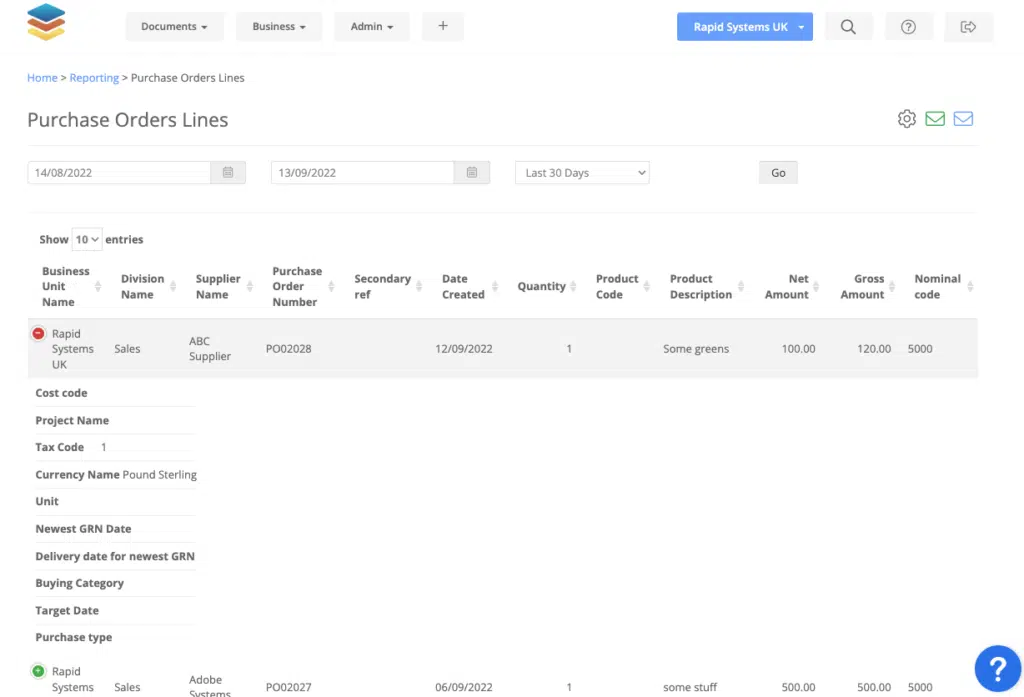
In this example, we will run a Purchase Order line items report. Click this report to open the settings:


You can adjust the time range where it says Last 30 days. Choose a time period that suits. At this point you could click Go to get the search results;

If you were happy with this data you could export it by clicking the green email icon to receive an Excel spreadsheet or the blue icon to receive a CSV file.
The pending reports button will show you the queue of your reports. Make sure you check your junk folder in case reports aren’t received in your main inbox.
In the screen above, you have the settings icon. Click this to reveal the filtering we offer:
Here you can make changes to the filtering. You can also save this profile to run it again in the future. Give the profile a Name under the Name field and then click the save icon. Any previous saved profiles can be run by selecting them from the ‘Select Profile’ selector.
Clicking Run will run your report with this profile.
Once you have profiles created, your process will be:
You can create your own custom reports by clicking the Add Report button. There are a fixed amount of datasets you can choose from. You can choose a dataset and see the available fields that can be used on the report.
Once created the report will be available in the reporting section. You can edit or delete a custom report again. Look for the Edit icon when in a report.
Some reports are warehoused. What this means is that data is pushed into a separate reporting database transactionally. We are moving back to more live reporting though where we report on the live database of Zahara. There is a new section of reports purely for Live reports, including our most sophisticated report, GRNI. This is found under the Live Queries section.
Lie Queries have been built with speed and complexity in mind. They have fewer settings, just Business unit. Once run, you can export to Excel or JSON. There is no date range here, it is everything.