Business Unit Category
Add an email signature
Coding Restrictions
Create new Business Unit
Custom Fields on Line Items
Customised labels
Date formating
Default delivery address
Division Management
Editing Email Templates
How to hide cost codes
Invoice email forwarding – Microsoft 365
Pros and Cons of Using Zahara’s Inbuilt Email Service vs. Your Own SMTP
SMTP & Email Sending
T&C on your PO Template
Invoice Processing Help Category
Auto reject supplier invoices
Auto rejecting of invoices issue
Finding an order or invoice
How to create a credit note
Invoice email forwarding – Microsoft 365
Invoice export colours
Invoice Inbox
Invoice List View
Invoice matching
Invoice Processing Explained
Month end cut offs
Negative Order Balance
Setting up Autopilot
Supplier Matching
Waiting for a GRN
Purchase Orders Category
Adding a product to an order
Adding documents to an order
Bulk importing orders
Close Orders Automatically
Closing an order
Copy PO to Buyer
Creating a Purchase Order
Deleting a PO
Duplicate Order Prevention
Editing an order
Finding an order or invoice
GRN an Order – Learn with this Guide
Grouped Purchase Orders
Import Line Items
Negative Order Balance
PO Template Editing
Product Centric Buying
Purchase Order Numbering
Purchase Order PDF
Purchase Order Prefix
Purchase Requisition Number
Quick Create a Purchase Order
Send PO to Supplier
Supplier order acceptance
What is a Purchase Order?
There are times when you need your approvers to also code an invoice or an order as part of the approval. Coding can include the Account code (ledger/nominal), the Cost Code or the Project code. You can create an approval set that requests/demands the user to take action.
Edit your Division and scroll down to the Workflows.
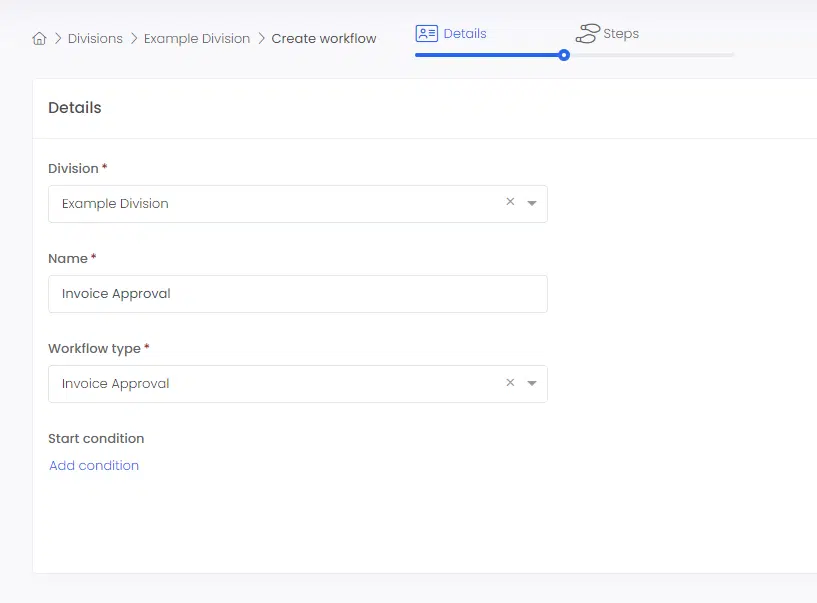
Create a new workflow with the approval type of “Invoice Approval” and give it a name as shown below:

Then create your first email step by naming it and clicking add new step:
The “Invoice” step allows you to request that the approver must also code the invoice as shown in the screen shot above. You can choose on the left:
The wording of the invoice approval email can be edited under Business Settings > HTML Templates as shown below:
The ability to Approve or Reject only will be removed from the Approval email if the approval step is set to “Must Edit”. In this case, the “Review with Details” link will be the sole link. On the Mobile app, approvers will be required to code the document before completing it.
The approver will receive an email and the Review link will take them through to a screen as shown:
In the example above, the user has to add the project code before they can approve (or Reject).